Generating Your First Report Comment
Write a comment end to end: subject pills, focus areas, a personal note, then the Check comment workspace that runs five checks before you save.
The Report Generation Process
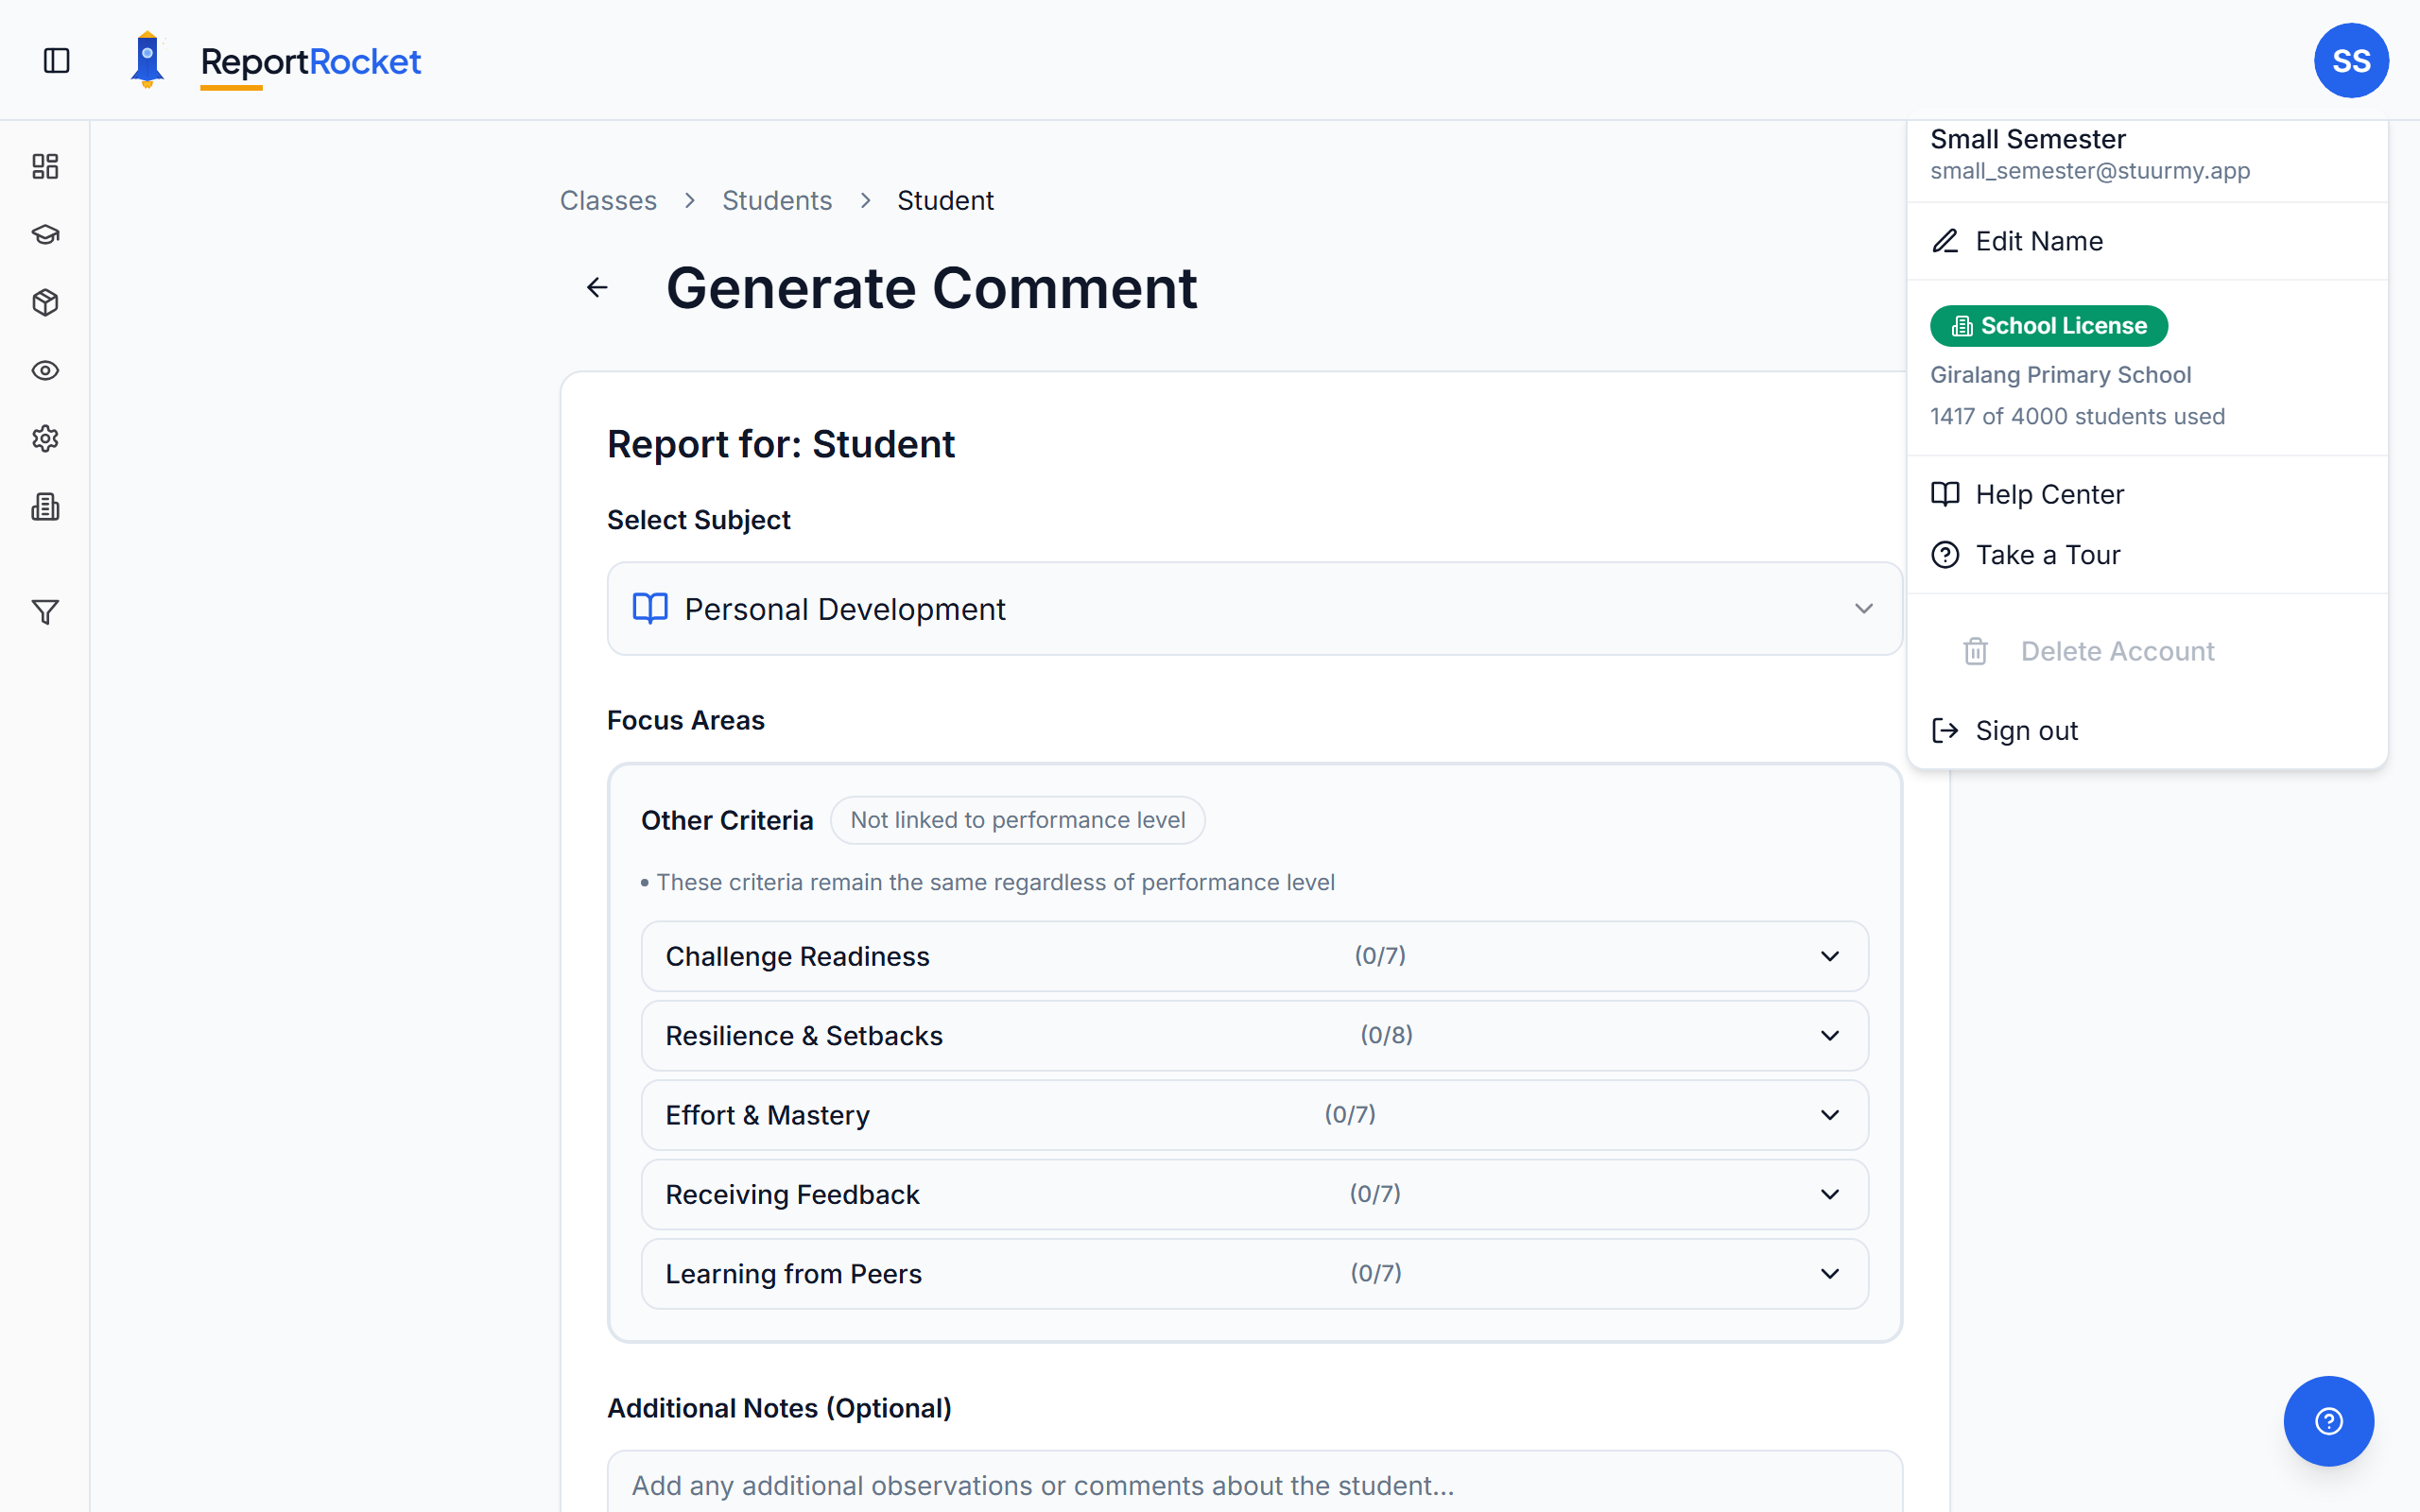
ReportRocket writes a comment from two things: the focus areas you tick, and anything you tell it about the student. The more of the second you give it, the less the comment sounds like everyone else's.
Open a student from your class list and you land on the generate page. A Student 3 of 27 counter sits at the top, with arrows to move to the previous or next student without going back to the class.
Step 1: Pick a Subject
Subjects run across the top as a row of pills. Click one to switch to it. Each pill shows how many focus areas you have ticked in that subject, so you can see at a glance where your ticks are.
General leads the row, and it is worth starting there. It holds your Traits, the character words that shape how the comment opens.
Step 2: Set the Performance Level
Subjects that carry High, Medium and Low sets show a row of level buttons. Pick the level first, because the focus areas underneath change to match it.
Not every subject works this way. General, Traits and Future Focus use a simple word selection instead, with no performance level at all.
Step 3: Tick Your Focus Areas
Open a category and tick the focus areas that describe this student. Where a subject has only one category, ReportRocket opens it for you.
A few well-chosen ticks beat a long list. Everything you tick has to fit inside your school's character limit, so ticking everything just crowds out the things that matter.
The Selected focus areas badge tracks your ticks across every subject and tells you how the length is shaping up, for example "4 selected. Your notes help, but this will still come in under your 600 character minimum. Around 1 to 2 more focus areas would reach it." Click the badge any time to review or remove selections.
Step 4: Make It Personal
Under the criteria sits Make it personal, which carries the student's first name in its heading. One real observation is what separates a comment that could be about anyone from one that is clearly about this student.
If you are stuck, three starter chips give you a sentence to finish:
- A goal to work towards
- A moment of growth
- Something to keep working on
Anything concrete works well: a moment from class, a breakthrough, a favourite topic, something they are still wrestling with. A Personalised badge appears once your note has enough in it to shape the comment.
Your Quick Guide
Beside the comment area is a short checklist showing what will shape this comment: character words, then focus areas, then your personal note, and where relevant a closer to finish on.
Items tick off as you satisfy them, and some rows offer a Show me button that jumps you straight to the right place. Which rows you see depends on your school's curriculum, so you may see fewer than five.
Nothing on the list is required. It is a guide, not a gate. Generate whenever you feel ready.
Semester 1 Side by Side
In Semester 2, the student's Semester 1 comment sits on the page beside your work, so families never read the same thing twice.
Step 5: Generate
Click Generate. The button becomes available once you have ticked a focus area or written a note. Your comment appears in the right-hand pane, ready to edit.
Under the comment is a character count against your school's range, along with a line explaining where the comment sits. If it has come in short, that line tells you why and what would fix it, which is usually another focus area or two followed by a regenerate.
Regenerate writes a fresh comment from the same selections. Your ticks and notes are not lost, so you can regenerate as often as you like. You can also edit the comment directly at any point.
Step 6: Check the Comment
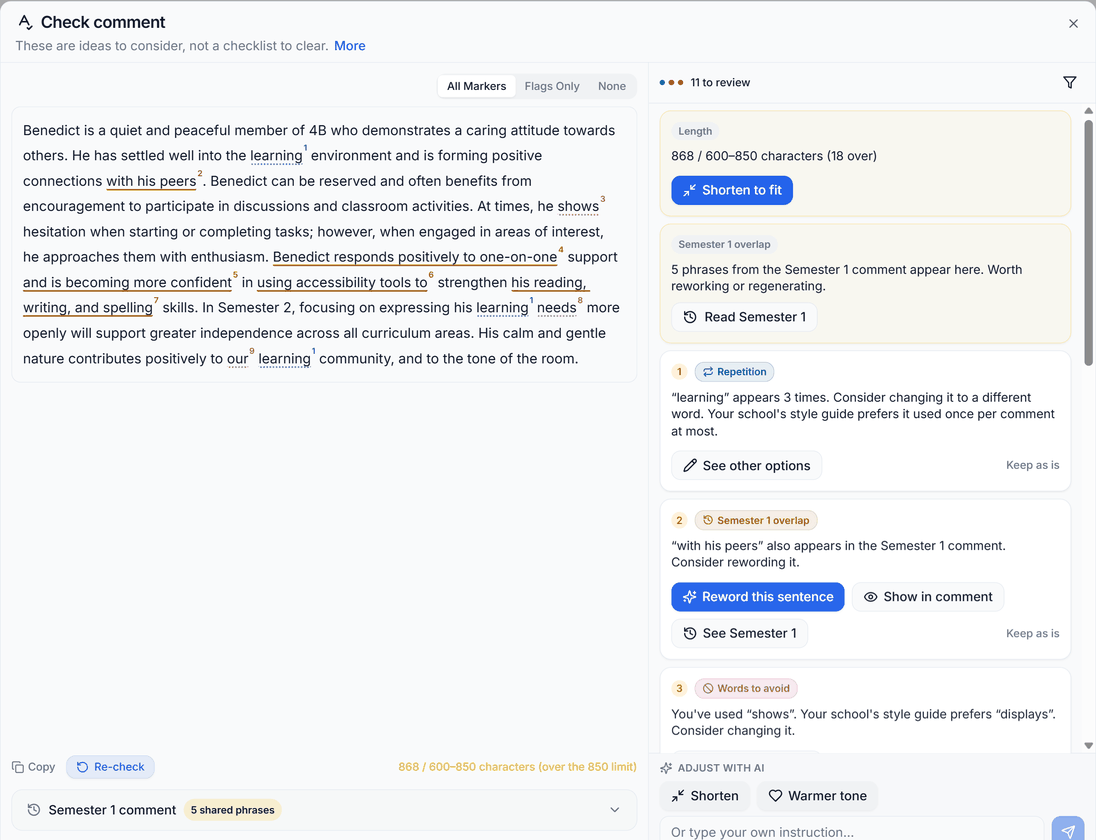
Check comment opens a two-pane workspace that runs five checks together: spelling and grammar, length, repetition, overlap with the student's Semester 1 comment, and your school's own style rules. A summary row at the top gives you the verdict, and a filter icon lets you turn individual checks on or off.
Findings Become Cards
Anything worth a look appears as a card on the right, matched to a coloured underline in the comment on the left. Hover a card and the relevant text lights up.
- See other options swaps a single word
- Overlap cards can reword a whole sentence
- The length card offers to shorten or lengthen the comment to fit your range
You preview every suggestion before it is applied. Nothing changes on its own.
Turning the Markers Down
The marker toggle controls how much you see. All Markers shows tracked changes and finding underlines together. Flags Only drops the tracked changes so you can read the comment cleanly. None hides the lot for a final read.
Adjust with AI
The Adjust with AI panel takes a plain instruction: shorten it, warm the tone, or type your own. The rewrite comes back as tracked changes for you to Keep or Discard, so nothing changes behind your back.
When you are finished, Done takes you back with everything you accepted already in the comment. Revert changes restores the comment to how it was when you opened the workspace.
Step 7: Save
Your work saves as you go. When the comment is finished, choose:
- Save to Draft, to save and stay on this student
- Save & Next, to save and open the next student
- Mark Ready for Review, which marks the comment ready and is what puts it into a Review Pack later
Mark Ready for Review is a split button. The arrow beside it marks the comment ready and opens the next student in one press, which is the quickest way through a class.
Tips for Great Comments
- Start with a Trait. Two character words carry the opening sentence, and it is the sentence families notice.
- Be concrete in your note. "Moved from level 18 to 22 readers" gives ReportRocket far more to work with than "improved in reading".
- Do not pad a short comment. If a comment comes in under your range, add a focus area and regenerate rather than stretching what is there.
- Spread your ticks. Focus areas in more than one subject give a rounder comment.
- Replay the tour. Both the generate page and the Check comment workspace have short guided tours, available any time from the Help menu at the bottom right of the screen.
Next Steps
Was this article helpful?